Adding a New Employee
HR Admins can add new employees to the Udyamo HRMS system individually or via bulk import. This acts as the first step in the employee’s lifecycle.
Method 1: Individual Addition
- Navigate to Employees > Employee Onboarding.
- Click the + Add Employee button.
- Basic Details: Enter the First Name, Last Name, Official Email, and Phone Number.
- Employment Details:
- Department & Designation: Assign their functional team and role.
- Date of Joining: This triggers the start of their tenure.
- Reporting Manager: Assign the manager responsible for their approvals.
- System Access: Toggle Welcome Email to automatically send login credentials to the employee.
- Click Save & Continue to create the profile.
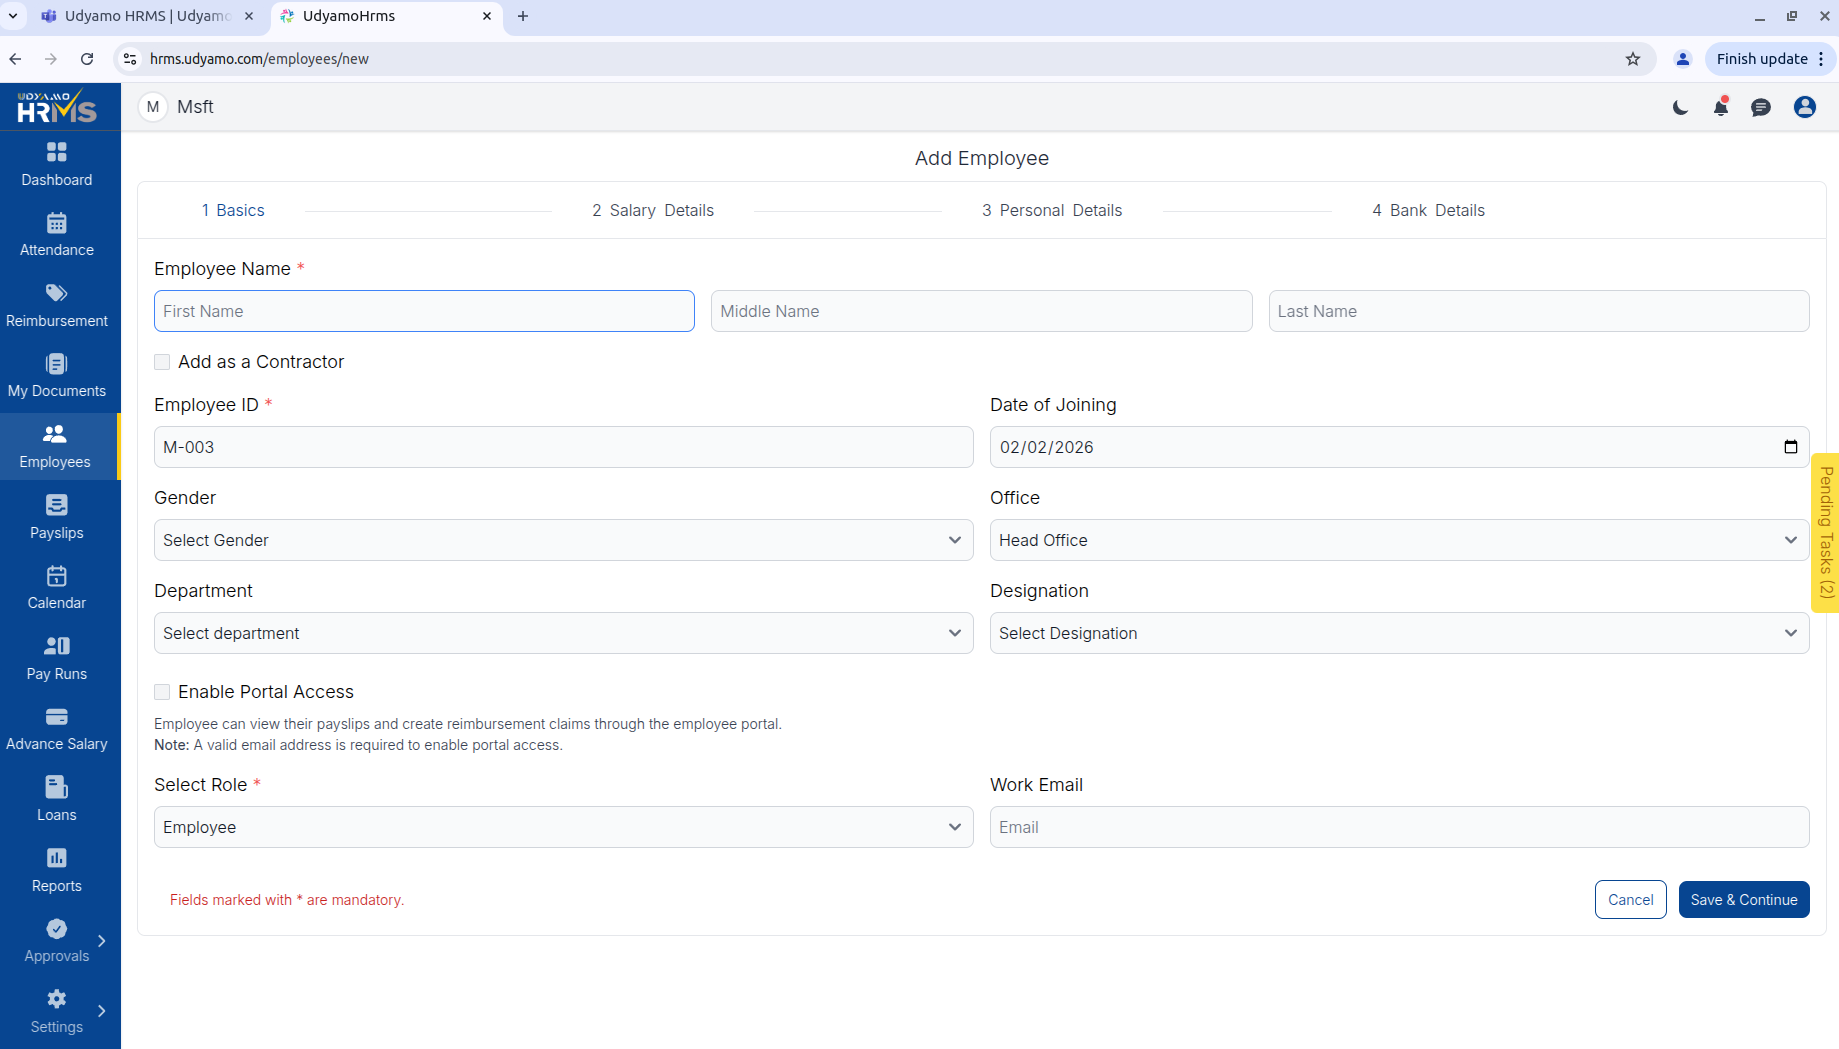 (Refer to the screenshot above - Add Employee Form)
Method 2: Bulk Import
For onboarding multiple employees at once:
- Go to Employees > Employee Onboarding.
- Download Template: Get the standardized CSV file.
- Fill Data: Enter employee details in the respective columns (do not change headers).
- Upload: Drag and drop the filled CSV file.
- Map Columns: Verify that the CSV headers match the system fields.
- Click Import.
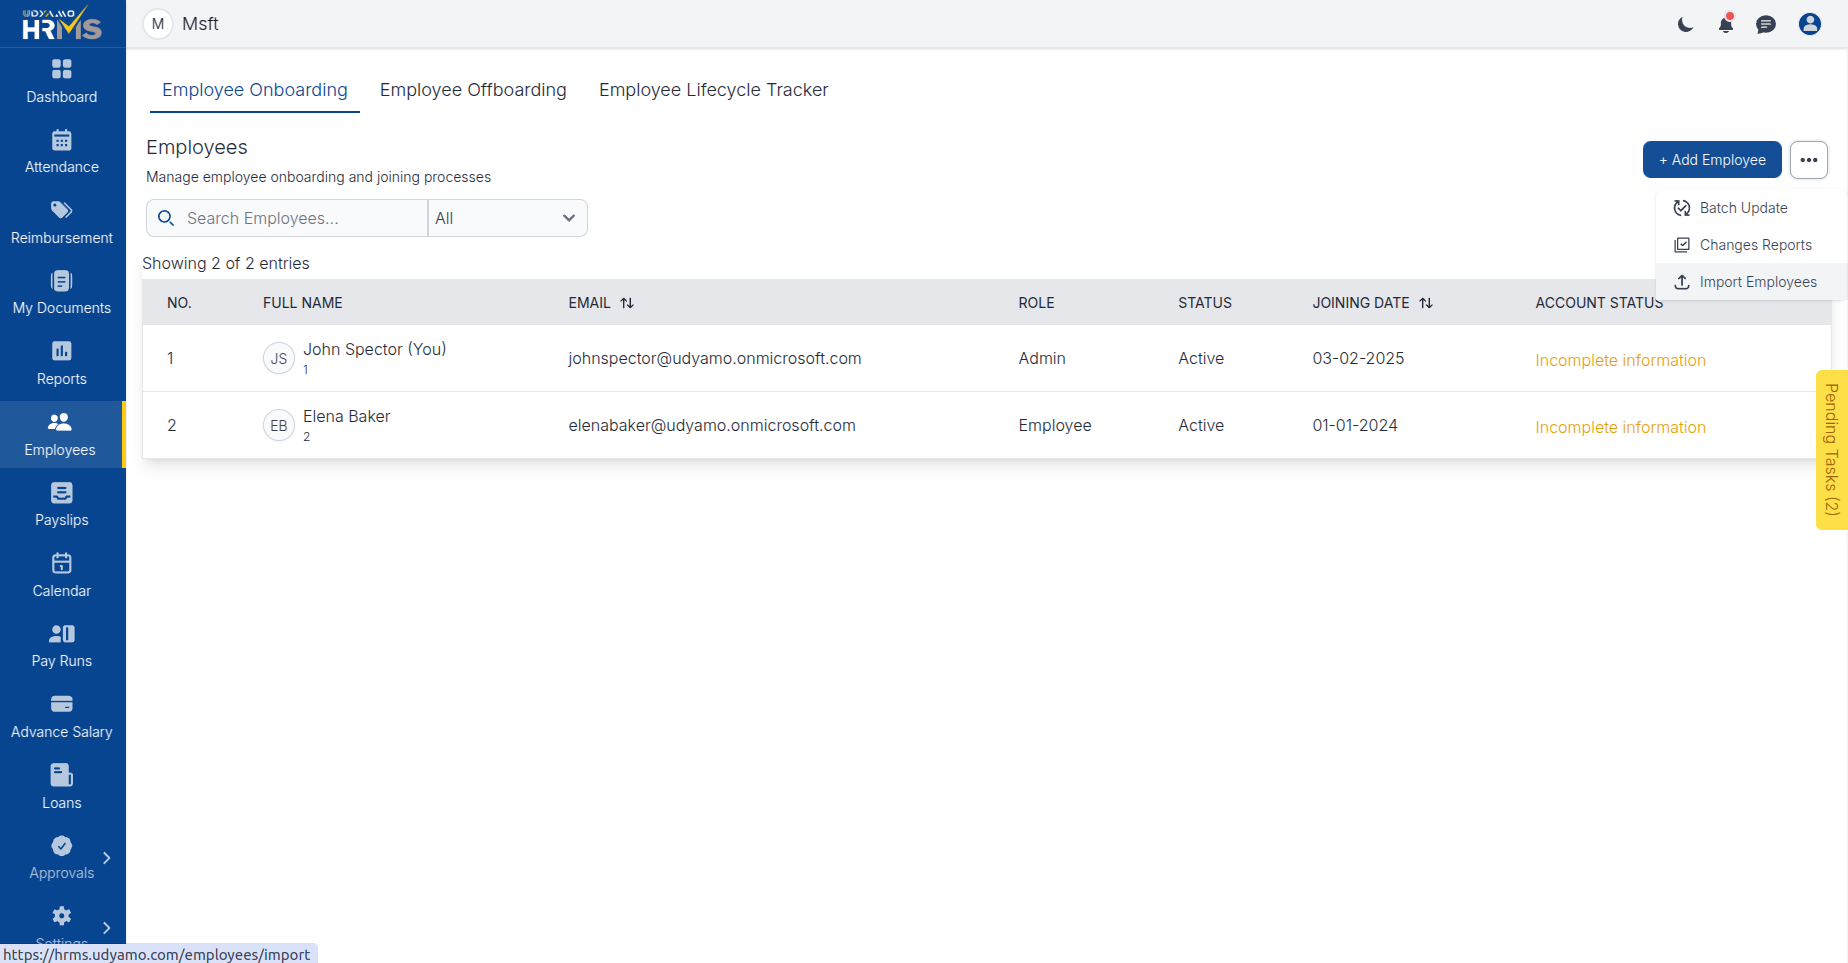 (Refer to the screenshot above - Bulk Import Interface)
Employee Profile Overview
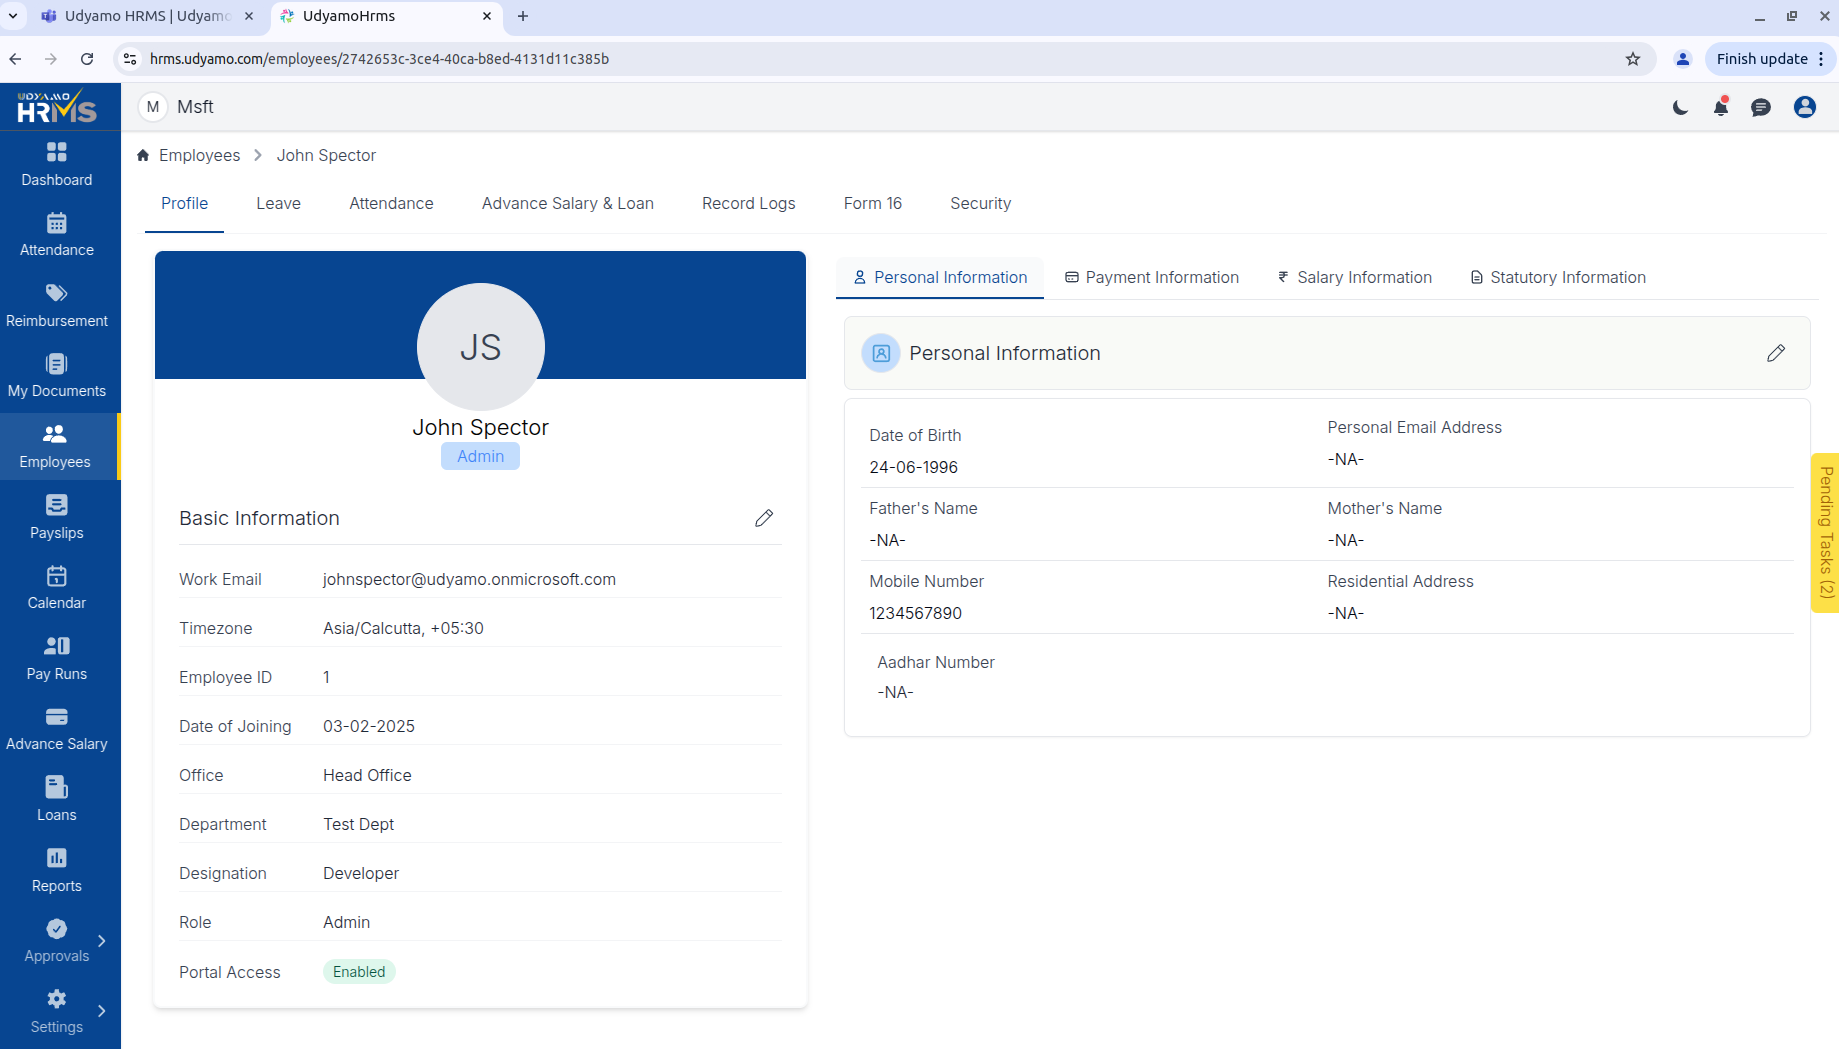 (Refer to the screenshot above - Employee Profile View)
The Employee Profile is the central repository for all staff information. It is organized into detailed tabs:
1. Personal & Contact
- Identity: Date of Birth, Gender, Marital Status, Blood Group.
- Contact: Mobile Numbers, Personal Email, Emergency Contacts.
- Addresses: Present (Mailing) and Permanent addresses.
2. Job & Work
- Organization Control: Employee ID, Department, Grade/Band, Location.
- Shift & Policy: Assigned Shift Timing, Attendance Policy, and Leave Policy.
- Probation: Probation period duration and confirmation due date.
3. Documents
- A secure digital vault for employee documents.
- Uploads: Offer Letter, Aadhar/ID Proofs, Educational Certificates, Relieving Letters.
- Privacy: Document visibility can be restricted to HR Admins only.
Employee Lifecycle Tracker
The Lifecycle Tracker provides a visual timeline of an employee’s journey within the organization. It gives a chronological view of every major event since joining.
![]() (Refer to the screenshot above - Lifecycle Tracker Timeline)
(Refer to the screenshot above - Lifecycle Tracker Timeline)
To view the tracker:
- Navigate to Employees.
- Click on the Employee Lifecycle Tracker tab.
Key Lifecycle Events Tracked:
- Onboarding: Date of Joining and account creation.
- Probation Confirmation: When the employee successfully completes probation.
- Role Changes: Updates to Designation or Department (Transfers).
- Appraisals: Yearly performance reviews and salary revisions.
- Status Changes: Moves between Active, Long Leave, or Notice Period.
This timeline acts as an audit trail for HR decision-making and history verification.
Updating Employee Status (Transitions)
Employee status updates drive system access and payroll processing.
- Active: Regular employee with full access.
- Probation: New joinees under evaluation.
- Notice Period: Employee who has resigned; strictly monitored for assets and handover.
- Inactive/Terminated: Access revoked immediately.
Offboarding & Exit Management
The Offboarding module handles the employee resignation and separation process.
Initiating Separation
To initiate offboarding, navigate to Employees > Employee Offboarding.
Required Details:
- Select Employee: Choose the employee resigning or being terminated.
- Reason for Resignation: Provide a detailed reason for the separation.
- Notice Period (in days): Specify the notice period duration (e.g., 30 days). Default notice period applies as per company policy.
Once submitted, the offboarding process is initiated.
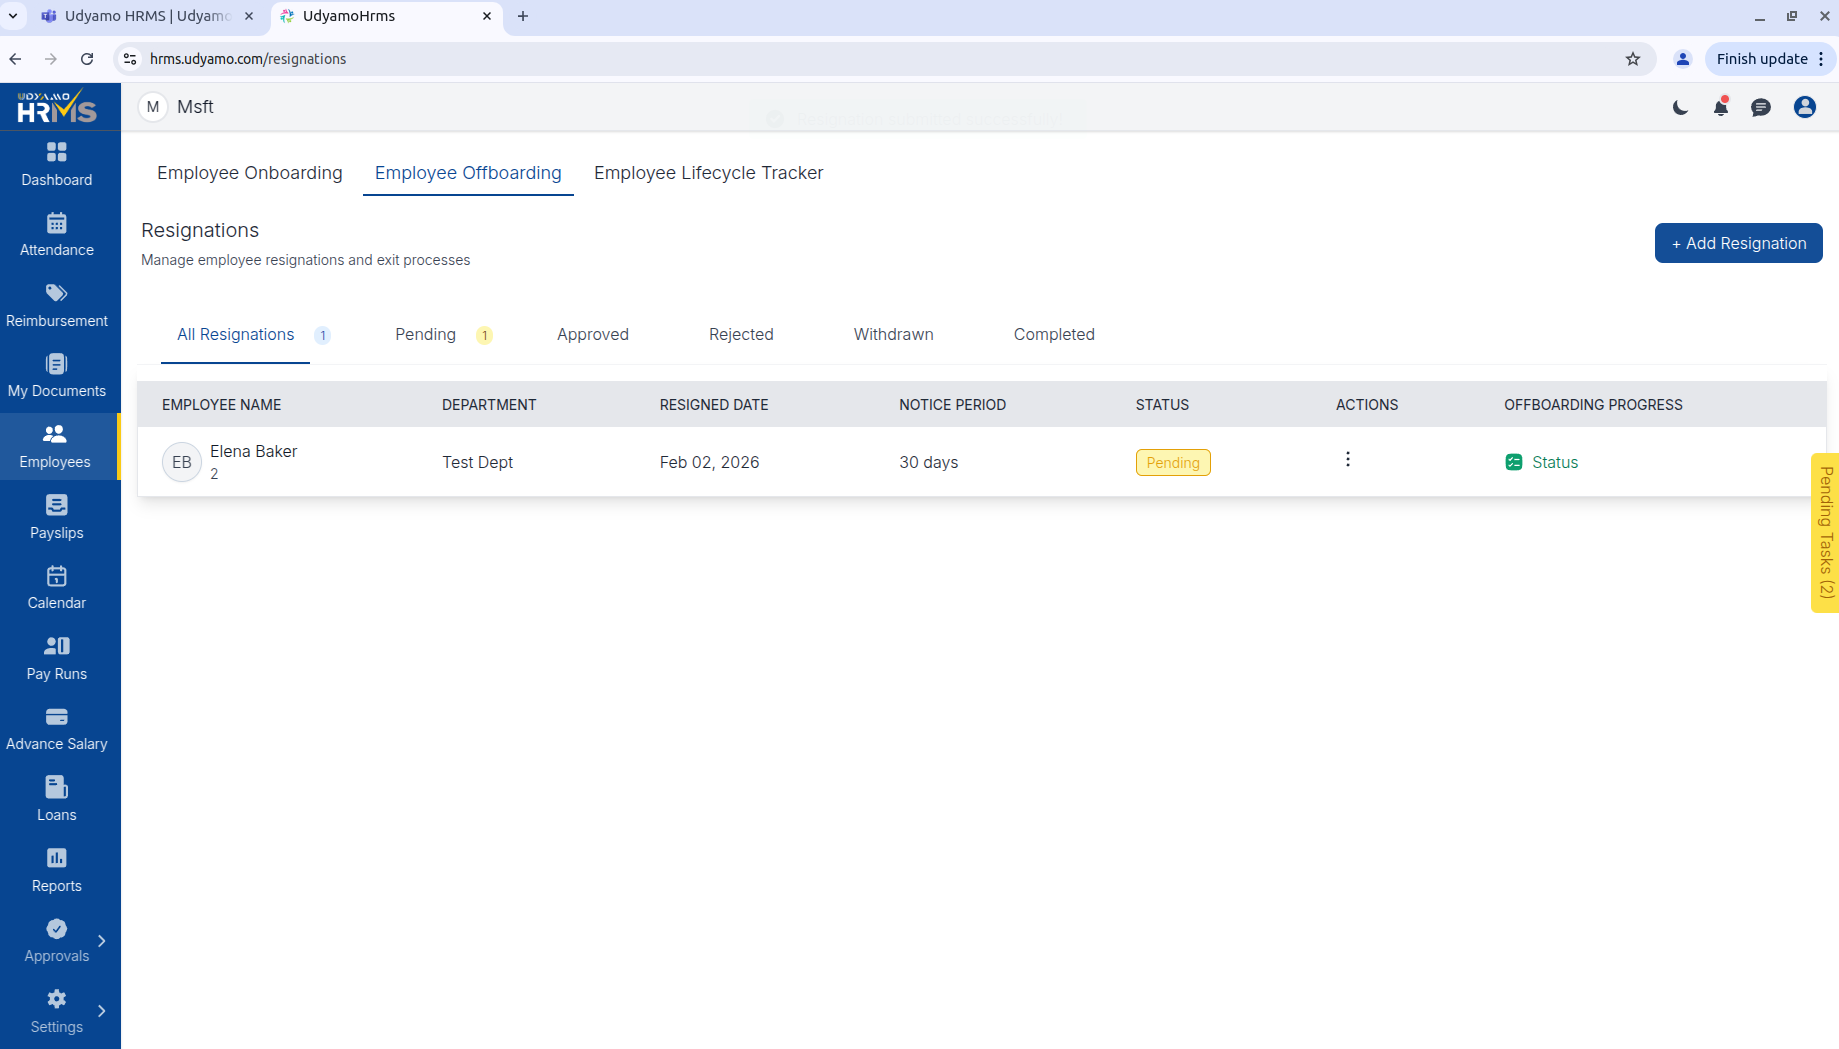 (Refer to the screenshot above - Offboarding Details)